Appearance
模块化规范
在之前的模块化演进过程中,我们已经提到了从第四阶段开始就出现了很多的模块化规范,从一开始的需要模块化标准和模块化加载的基础库(模块化标准 + 模块加载器)到后来的标准化模块化规范,下面仔细了解一下。
CommonJS规范
nodeJS中提出的标准,在node.js中所有的代码必须遵循CommonJS规范。
使用方式
- 一个文件就是一个模块
- 每个模块都有单独的作用域
- 通过module.exports导出成员
- 通过require函数载入模块
存在问题
这种方式在浏览器使用有一些问题,因为CommonJS是以同步模式加载模块,node在启动的时候加载模块,使用的时候不需要加载模块,所以使用的时候不会有问题。但是浏览器端页面加载用CommonJS会造成大量同步模式加载模块,造成资源浪费。
AMD规范
浏览器端根据自身特性结合CommonJS使用了AMD规范(异步模块定义规范),还推出了新的库require.js实现了AMD规范。
使用方式
- 定义模块使用define
js
/**
 * 第一个参数是当前模块的名字
 * 第二个参数是一个数组,依赖的模块
 * 第三个回调中的参数与前面的数组一一对应,是每个模块导出的成员
 * 作用是为当前模块提供一个私有空间
 */
define([
  'module1',
  ['jquery', './module2']
], function($, module2) {
// 如果需要给外部导出成员的话用return实现
  return {
    init: function () {
      $('body').animate({ margin: '200px' })
      module2()
    }
  }
})- 加载模块用require
js
// 内部会自动创建一个script标签发送请求,并且执行相应的模块代码
require(['./module1'], function (module1) {
  module1.init()
})目前绝大多数第三方库都支持AMD规范
存在问题:
- AMD使用起来相对复杂
- 如果模块划分比较细致的话,模块JS文件请求的次数比较频繁导致页面效率比较低下
CMD规范
这个是淘宝实现的一个规范(通用模块定义规范),对应的库是Sea.js,类似CommonJS规范。其目的是写出来的代码尽可能和CommonJS类似,减少学习成本,这种方式最后被require.js兼容。
js
// CMD 规范(类似 CommonJS 规范)
define(function (require, exports, module) {
  // 通过 require 引入依赖
  var $ = require('jquery')
  // 通过 exports 或者 module.exports 对外暴露成员
  module.exports = function () {
    console.log('module 2~')
    $('body').append('<p>module2</p>')
  }
});ES Modules —— 模块化标准规范 重点
通过给 script 添加 type = module 的属性,就可以以 ES Module的标准执行其中的 JS 代码了
html
<script type="module">
    console.log('this is es module')
</script>ES Modules 基本特性
1. ESM 自动采用严格模式,忽略 'use strict'
严格模式下这个为undefined,非严格模式下这个为window
html
<script type="module">
    console.log(this) // undefined
</script>2. 每个 ES Module 都是运行在单独的私有作用域中
html
<script type="module">
    var foo = 100
    console.log(foo) // 100
</script>
<script type="module">
    console.log(foo) // foo is not defined
</script>3. ESM 是通过 CORS(跨域资源共享) 的方式请求外部 JS 模块的
请求外部地址,其服务端必须要支持 CORS
html
<!-- 当前网址不支持CORS,会报跨域错误 -->
<script type="module" src="https://libs.baidu.com/jquery/2.0.0/jquery.min.js"></script>
<!-- Access to script at 'https://libs.baidu.com/jquery/2.0.0/jquery.min.js' from origin 'http://127.0.0.1:5500' has been blocked by CORS policy: No 'Access-Control-Allow-Origin' header is present on the requested resource. -->
<!-- 换成支持 CORS的网址 -->
<script type="module" src="https://unpkg.com/jquery@3.4.1/dist/jquery.min.js"></script>4. 不支持文件方式,要使用http server方式使用
5. ESM 的 script 标签会延迟执行脚本
相当于添加了 defer 属性
html
<!-- 下面的代码会直接弹出alert,不点击不会显示下面的p标签 -->
<script src="index.js"></script>
<p>需要显示的内容</p>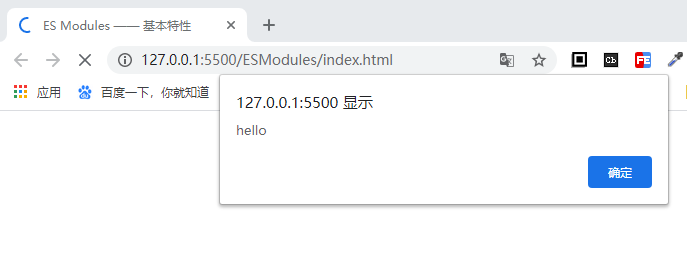
html
<!-- 下面的代码会显示下面的p标签,再直接弹出alert -->
<script type="module" src="index.js"></script>
<p>需要显示的内容</p>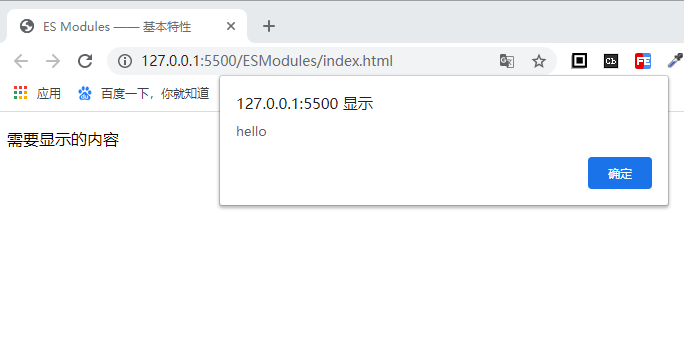
ES Modules导入导出
- export —— 模块内向外部暴露接口
- import —— 模块内导入其他模块所提供的接口
js
// ./module.js
const foo = 'es modules'
export { foo }

// ./app.js
import { foo } from './module.js'
console.log(foo) // es modules举个例子
html
<!--index.html-->
<body>
  <script type="module" src="app.js"></script>
</body>js
// module.js
export const name = 'xm'
// app.js
import { name } from './module.js'
console.log(name)打开浏览器可以看到输出xm
具体的方法详见ES6_modules
js
// module.js
const name = 'foo module'

function hello () {
    console.log('hello')
}

export {
    name as fooName,
    hello as fooHello
}

// app.js
import { fooName, fooHello } from './module.js'
console.log(fooName)
fooHello()js
// module.js
const name = 'foo module'

function hello () {
    console.log('hello')
}
// 默认导出
export {
    name as default,
    hello as fooHello
}

// app.js
import { default as fooName } from './module.js'
console.log(fooName)
// or
import name from './module.js'
console.log(name)js
// 只会加载模块执行代码,不会提取成员
import {} from './module.js'
// or
import './module.js'
// 对不需要外接控制的子功能模块时很有用如果东西特别多而且都要使用的时候
js
// 把所有的东西都放到mod对象里面,里面的东西都作为属性和方法,用点使用
import * as mod from './module.js'
console.log(mod)js
import { default as fooName, title} from './module.js'
// or
import fooName, {title} from './module.js'注意事项
- 导出并不是对象字面量
js
// 对象字面量
const obj = {
    name,
    age
}
// 虽然形式很像是固定的语法,并不是对象字面量
export {
    name,
    age
}
// 这个也是固定用法,用于提取,并不是解构
import { name, age } from './module.js'如果想要输出对象字面量的形式
js
export default { name, age }- 导出的是成员的引用
js
// module.js
// 内存空间有一个name的空间里面放了字符串的值
const name = 'foo module'
export { name }

// app.js
// 导入成员name的空间引用关系,访问的还是module.js里面的
import { name } from './module.js'
console.log(name)- 导入的成员是只读的,不可修改
- 导入的时候from后面跟着的是完整路径
- 不能省略
.js的扩展名(与CommonJS有区别)
js
import { fooHello } from './module'
// GET http://127.0.0.1:5500/ESModules/module net::ERR_ABORTED 404 (Not Found)- 后面相对路径的
./之类的不能省略,否则会认为加载的是第三方库(与CommonJS相同)
js
import { fooHello } from 'module.js'
// Uncaught TypeError: Failed to resolve module specifier "module.js". Relative references must start with either "/", "./", or "../".- 可以使用绝对路径和url,我们可以使用cdn
- 导入的必须在最顶层且不能是变量
- 不能再任何作用域中
js
if (true) {
    import { name } from './module.js'
}
// Uncaught SyntaxError: Unexpected token '{'- 不能是变量
js
const modulename = './module.js'
import { name } from modulename
// Uncaught SyntaxError: Unexpected identifier如何动态的加载模块?
js// import加载之后返回一个promise对象,执行完成之后执行then方法,会把模块放到参数module下面 import('./module.js').then(function(module){ console.log(module) // Module {Symbol(Symbol.toStringTag): "Module"} // default: "xm" // fooHello: ƒ () // Symbol(Symbol.toStringTag): "Module" })
ES Modules 导入导出成员
如果我们有组件a和组件b,我们要用的时候需要各自引用
js
// components/module-a.js
const name = 'a'
export { name }
// components/module-b.js
const name = 'b'
export { name }
// app.js
import { name as nameA } from './module-a.js'
import { name as nameB } from './module-b.js'如果组件多的话很不方便,我们需要一个统筹管理组件的index.js
js
// components/index.js
import { name as nameA } from './module-a.js'
import { name as nameB } from './module-b.js'
export { nameA, nameB }
// 这样app.js中就可以这样引用
// app.js
import { nameA, nameB } from './components/index.js'
console.log(nameA)
console.log(nameB)上面的index.js可以使用导入导出成员,这个里面不能使用成员,
js
export { name as nameA } from './module-a.js'
export { name as nameB } from './module-b.js'默认模块必须要重命名,否则会变成index.js的默认导出
js
// components/module-a.js
const name = 'a'
export default name
// components/index.js
import { default as nameA } from './module-a.js'ES Modules 浏览器环境 Polyfill
毕竟是ES6才出的规范,需要处理一下兼容问题,比如IE浏览器不执行esmodule。
有一个兼容模块 Browser ES Module Loader,我们把这个模块引入到script标签中就可以使用ES Module了。
html
<script src="dist/babel-browser-build.js"></script>
<script src="dist/browser-es-module-loader.js"></script>

<!-- script type=module loading -->
<script type="module" src="path/to/module.js"></script>里面可以用npm下载,所以我们访问https://unpkg.com/就可以找到用,npm下载的包,如果有跨域问题的童鞋复制到本地访问也是一样的。
html
<script src="https://unpkg.com/browse/browser-es-module-loader@0.4.1/dist/babel-browser-build.js"></script>
<script src="https://unpkg.com/browse/browser-es-module-loader@0.4.1/dist/browser-es-module-loader.js"></script>
<script type="module" src="app.js"></script>而IE不支持promise,还是会报错
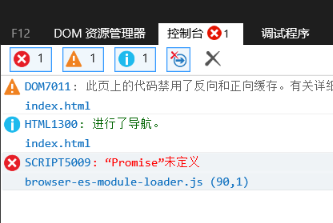
我们还要引入一个Promise Polyfill
html
<script src="https://unpkg.com/promise-polyfill@8.1.3/dist/polyfill.min.js"></script>
<script src="https://unpkg.com/browse/browser-es-module-loader@0.4.1/dist/babel-browser-build.js"></script>
<script src="https://unpkg.com/browse/browser-es-module-loader@0.4.1/dist/browser-es-module-loader.js"></script>
<script type="module" src="app.js"></script>这个时候IE可以正常工作了,但是其他正常支持的浏览器会输出两遍
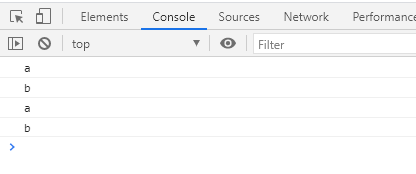
我们可以通过script标签中的nomodule来区分支不支持ES Module。如果不支持ES Module的会执行这个,这个在本地环境浏览即可,生产环境不要这样使用,效率很差
html
<script nomodule></script>
<!--在每个前面添加即可-->
<script nomodule src="https://unpkg.com/promise-polyfill@8.1.3/dist/polyfill.min.js"></script>
<script nomodule src="https://unpkg.com/browse/browser-es-module-loader@0.4.1/dist/babel-browser-build.js"></script>
<script nomodule src="https://unpkg.com/browse/browser-es-module-loader@0.4.1/dist/browser-es-module-loader.js"></script>ES Modules in Node.js
node 8.5+ 已经开始支持ES Modules,因为这个和CommonJS的语言差别还是比较大的,所以目前还在过渡阶段。
那如何在node环境中使用ES Modules?
- 将文件的扩展名改为
.mjs - 在命令行中执行的时候要添加参数
--experimental-modules
js
// index.mjs
import { foo, bar } from './module.mjs'

console.log(foo, bar)

// module.mjs
export const foo = 'hello'

export const bar = 'world'在命令行中执行
bash
node --experimental-modules index.mjs
#(node:8404) ExperimentalWarning: The ESM module loader is experimental.
#hello world不过这里有一个警告,因为是实验特性,所以不建议在生产环境中使用。
载入node内置模块
js
// 可以载入原生模块
import fs from 'fs'
fs.writeFileSync('./foo.txt', 'es module working')因为系统内置成员对 ESM 的提取成员方式做了兼容,将所有的模块单独导出,然后再将整体做一个默认导出。
js
// 内置模块兼容了 ESM 的提取成员方式
import { writeFileSync } from 'fs'
writeFileSync('./bar.txt', 'es module working~')载入第三方模块
js
// 可以载入第三方模块
import _ from 'lodash'
console.log(_.camelCase('ES Module'))这里不支持单独提取成员,以为这里不是解构,而且第三方模块都是导出默认成员,不会单独将每一个成员导出
js
import { camelCase } from 'lodash'
console.log(camelCase('ES Module'))
// SyntaxError: The requested module 'lodash' is expected to be of type CommonJS, which does not support named exports. CommonJS modules can be imported by importing the default export.
// For example:
// import pkg from 'lodash';
// const { camelCase } = pkg;ES Modules与CommonJS交互
ES Modules中载入CommonJS模块
js
// commonjs.js
// CommonJS 模块始终会导出一个默认成员

// 第一种
module.exports = {
  foo: 'commonjs exports value'
}

// or 第二种
exports.foo = 'commonjs exports value'在其他.mjs中引用
js
// es-module.mjs
// ES Module 中可以导入 CommonJS 模块

import mod from './commonjs.js'
console.log(mod)
// 可以导出
// { foo: 'commonjs exports value' }ps: 这里不能直接提取成员,注意 import 不是解构导出对象
jsimport { foo } from './commonjs.js' console.log(foo) // import { foo } from './commonjs.js' // ^^^ // SyntaxError: The requested module './commonjs.js' is expected to be of type CommonJS, which does not support named exports. CommonJS modules can be imported by importing the default export.
可以在 CommonJS 模块中载入ES Module 吗?
在原生环境中不可以
总结
- ES Modules 中可以导入 CommonJS模块
- CommonJS中不能导入ES Modules模块
- CommonJS始终只会导出一个默认成员
- 注意import不是解构导出对象
ES Modules与CommonJS的差异
ES Modules中没有CommonJS的模块全局成员
js
// CommonJS 中可以直接使用,在 ESM 中会报错
// 加载模块函数
console.log(require)
// 模块对象
console.log(module)
// 导出对象别名
console.log(exports)
// 当前文件的绝对路径
console.log(__filename)
// 当前文件所在目录
console.log(__dirname)上面的require\module\exports可以使用export和import代替,西面的__filename和__dirname可以这样代替
js
import { fileURLToPath } from 'url'
import { dirname } from 'path'
// import是一个对象
// import.meta.url拿到的是文件url地址
// fileURLToPath 这个方法可以把文件地址转化成路径
const __filename = fileURLToPath(import.meta.url)
console.log(__filename)
// dirname方法 将文件的路径提取出来文件夹的部分
const __dirname = dirname(__filename)
console.log(__dirname)新版本支持情况
在package.json中添加一个type字段,标明用的是module,那么文件扩展名可以不用.mjs,直接用.js就可以
js
{
    'type':'module'
}里面如果要用CommonJS的语法,需要将扩展名改为.cjs
Babel 兼容方案
旧版本的js代码需要使用babel去编译
使用preset-env转换
- 安装模块
npm i @babel/node @babel/core @babel/preset-env --save-dev - 编写文件
js
// index.js
import { foo, bar } from './module.js'
console.log(foo, bar)

// module.js
export const foo = 'hello'
export const bar = 'world'

// package.json
{
  "name": "babel",
  "version": "1.0.0",
  "description": "",
  "main": "index.js",
  "dependencies": {},
  "devDependencies": {},
  // 必写,否则报错
  "type":"module",
  "scripts": {
    "test": "echo \"Error: no test specified\" && exit 1",
    // 添加babel-node命令
    "babel-node":"babel-node"
  },
  "keywords": [],
  "author": "",
  "license": "ISC"
}- 命令行输入
npm run babel-node index.js --presets=@babel/preset-env可以看到成功输出hello world
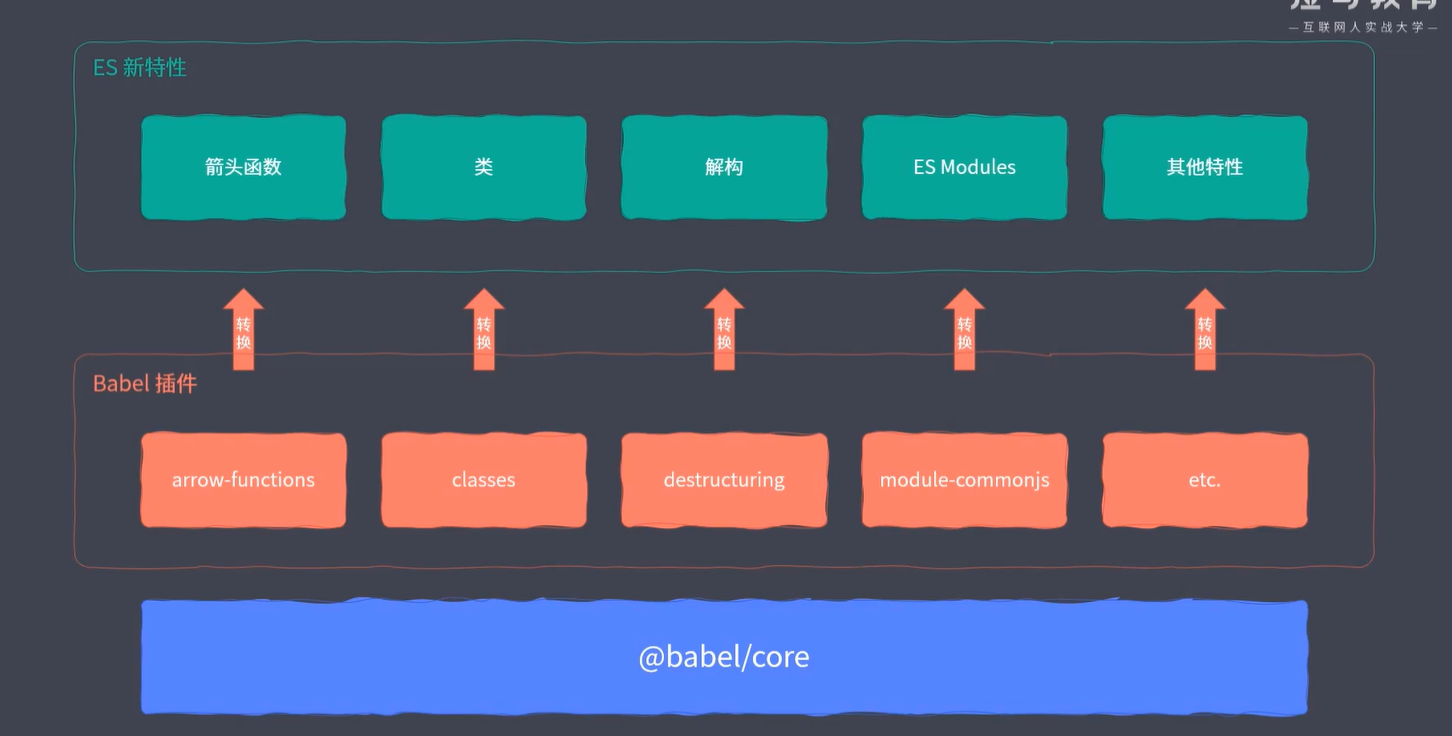
babel是基于插件机制实现的,其核心模块并不会去转换代码,具体转换代码的每个特性是通过插件实现的,我们需要一个插件去转换代码中的一个特性
之前安装的@babel/preset-env是插件的集合,里面包含了js所有的新特性,所以只用这个可以把ES Module转换过来。
- 如果每次输入参数麻烦可以优化
js
// .babelrc

{
  "presets": ["@babel/preset-env"]
}- 这样命令行直接写
npm run babel-node index.js就可以看到成功输出hello world
使用单独插件去转换
@babel/preset-env是插件的集合,那么可以单独引用插件,不必全部引用
- 安装
npm i @babel/node @babel/core @babel/plugin-transform-modules-commonjs --save-dev - 在
.babelrc文件中写
js
{
  "plugins": [
    "@babel/plugin-transform-modules-commonjs"
  ]
}- 命令行写
npm run babel-node index.js就可以看到成功输出hello world