Appearance
结合自动化工具
ESLint本身是一个独立的工具,如果在一个自动化构建工作流中,还是要把ESLint结合到自动化工具中,这样做的有点:
- 集成之后,ESLint一定会工作
- 与项目统一,管理更加方便(不用一会执行gulp,一会执行eslint)
与gulp的集成
- 下载文件模板csf-gulp-demo-master
- 完成相应的依赖安装
npm install - 完成 eslint 模块安装
npm i eslint --save-dev - 完成 gulp-eslint 模块安装
npm i gulp-eslint --save-dev - 在命令行对eslint进行初始化
npx eslint --init,按照下面进行选择:
js
√ How would you like to use ESLint? · style
√ What type of modules does your project use? · none
√ Which framework does your project use? · none
√ Does your project use TypeScript? · No / Yes
√ Where does your code run? · browser
√ How would you like to define a style for your project? · guide
√ Which style guide do you want to follow? · standard
√ What format do you want your config file to be in? · JavaScript
√ Would you like to install them now with npm? · No / Yes- 在
gulpfile.js中找到script函数
js
const loadPlugins = require('gulp-load-plugins')

const plugins = loadPlugins()
...
const script = () => {
  return src('src/assets/scripts/*.js', { base: 'src' })
    // 应该在babel处理之前进行eslint操作,因为babel处理之后就不属于源代码了。
    // 直接使用eslint进行检测
    .pipe(plugins.eslint())
    .pipe(plugins.babel({ presets: ['@babel/preset-env'] }))
    .pipe(dest('temp'))
    .pipe(bs.reload({ stream: true }))
}

...
module.exports = {
  clean,
  build,
  develop,
  // 调试阶段方便单独进行导出
  script
}- 命令行运行
npx gulp script成功,如果运行不成功参考,如果成功我们继续下面的操作。 - 在代码中编写一些问题代码再运行发现并没有报错, 因为eslint只会检查代码中的问题,并不会根据检查结果做出反馈
- 在gulpfile.js中修改
js
const script = () => {
  return src('src/assets/scripts/*.js', { base: 'src' })
    .pipe(plugins.eslint())
    // 先用format方法打印出具体的信息
    .pipe(plugins.eslint.format())
    // 在使用failAfterError方法让eslint检查出错误可以终止管道
    .pipe(plugins.eslint.failAfterError())
    .pipe(plugins.babel({ presets: ['@babel/preset-env'] }))
    .pipe(dest('temp'))
    .pipe(bs.reload({ stream: true }))
}这个时候问题代码就会展示出来,并且阻断了程序的运行,我们这样就把eslint结合到自动化构建流中。
与webpack结合
webpack集成eslint并不是用插件方式,而是用loader机制。
- 下载模板 csf-react-app-master
- 安装对应模块
npm install - 安装eslint模块
npm i eslint --save-dev - 安装eslint-loader模块
npm i eslint-loader --save-dev - 初始化.eslintrc.js配置文件
npx eslint --init - 在
webpack.config.js中修改
js
...
module.exports = {
  ...
  module: {
    rules: [
      {
        test: /\.js$/,
        exclude: /node_modules/,
        /**
        方法一,可以在这里弄给一个数组,确保eslint在babel的下面,从下往上执行
        use: [
          'babel-loader',
          'eslint-loader'
        ]
        */
        use: 'babel-loader'
      },
      /**
      方法二:单独领出来配置,在enforce中配置pre,保证这个在最前面执行
      */
      {
        test: /\.js$/,
        exclude: /node_modules/,
        use: 'eslint-loader',
        enforce: 'pre'
      },
      {
        test: /\.css$/,
        use: [
          'style-loader',
          'css-loader'
        ]
      }
    ]
  },
  ...
}- 执行代码,如果之前在初始化的时候没有要选择react框架,那么这里会报错,需要额外安装
npm i eslint-plugin-react --save-dev,并且在.eslintrc.js中要添加属性
- 方法一:
js
plugins: [
    'react'
],
rules: {
    // React变量没有使用
    'react/jsx-uses-react': 2,
    // App变量也没有使用
    'react/jsx-uses-vars': 2
}- 方法二:一般eslint都会提供一个共享的配置降低使用的成本,
eslint-plugin-react插件中也有两个共享配置,一个是all一个是recommended。所以也可以直接在这里写
js
extends: [
    // 格式固定
    'plugin:react/recommended',
    'standard'
],现代化项目集成ESLint
虽然react和vue.js框架的普及,这些框架的生态都已经完善了,现阶段我们要是开发框架的项目,基本上不需要自己去配置webpack或者eslint这些工程化的工具了,官方的cli中已经将他们集成进去了。下面用vue-cli作为项目演示:
- 创建空项目,安装vue-cli
npm install @vue/cli -g - 使用
vue create csf-vue-app <>创建项目csf-vue-app - 选择需要的配置
js
Vue CLI v4.5.8
? Please pick a preset: (Use arrow keys)
// 选择默认还是手动选择特性
  Default ([Vue 2] babel, eslint)
  Default (Vue 3 Preview) ([Vue 3] babel, eslint)
> Manually select features
// 选择项目需要的特性
? Check the features needed for your project: Choose Vue version, Babel, Linter
// 选择vue.js初始版本
? Choose a version of Vue.js that you want to start the project with (Use ar? Choose a version of Vue.js that you
want to start the project with 3.x (Preview)
// 选择linter的格式配置
? Pick a linter / formatter config: Standard
// 选择什么时候进行检测
? Pick additional lint features: Lint
on save, Lint and fix on commit
// 是否要将特性进行保存
? Save this as a preset for future projects? No选择完成之后就可以看到项目创建成功
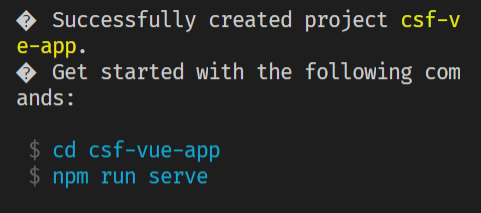
- 执行命令
cd csf-vue-app和npm run serve,就可以打开浏览器看到vue项目。在main.js后面写一个const a = 1浏览器中直接就会显示错误蒙层
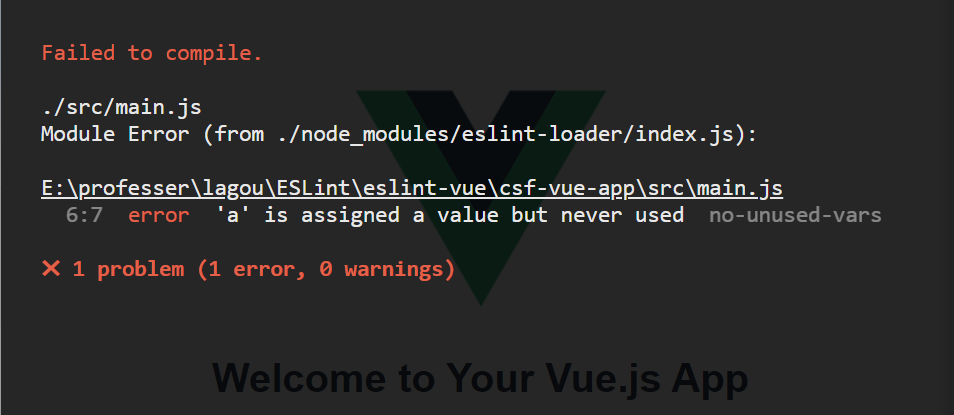
这就是现代化项目中自动集成eslint的例子。