Appearance
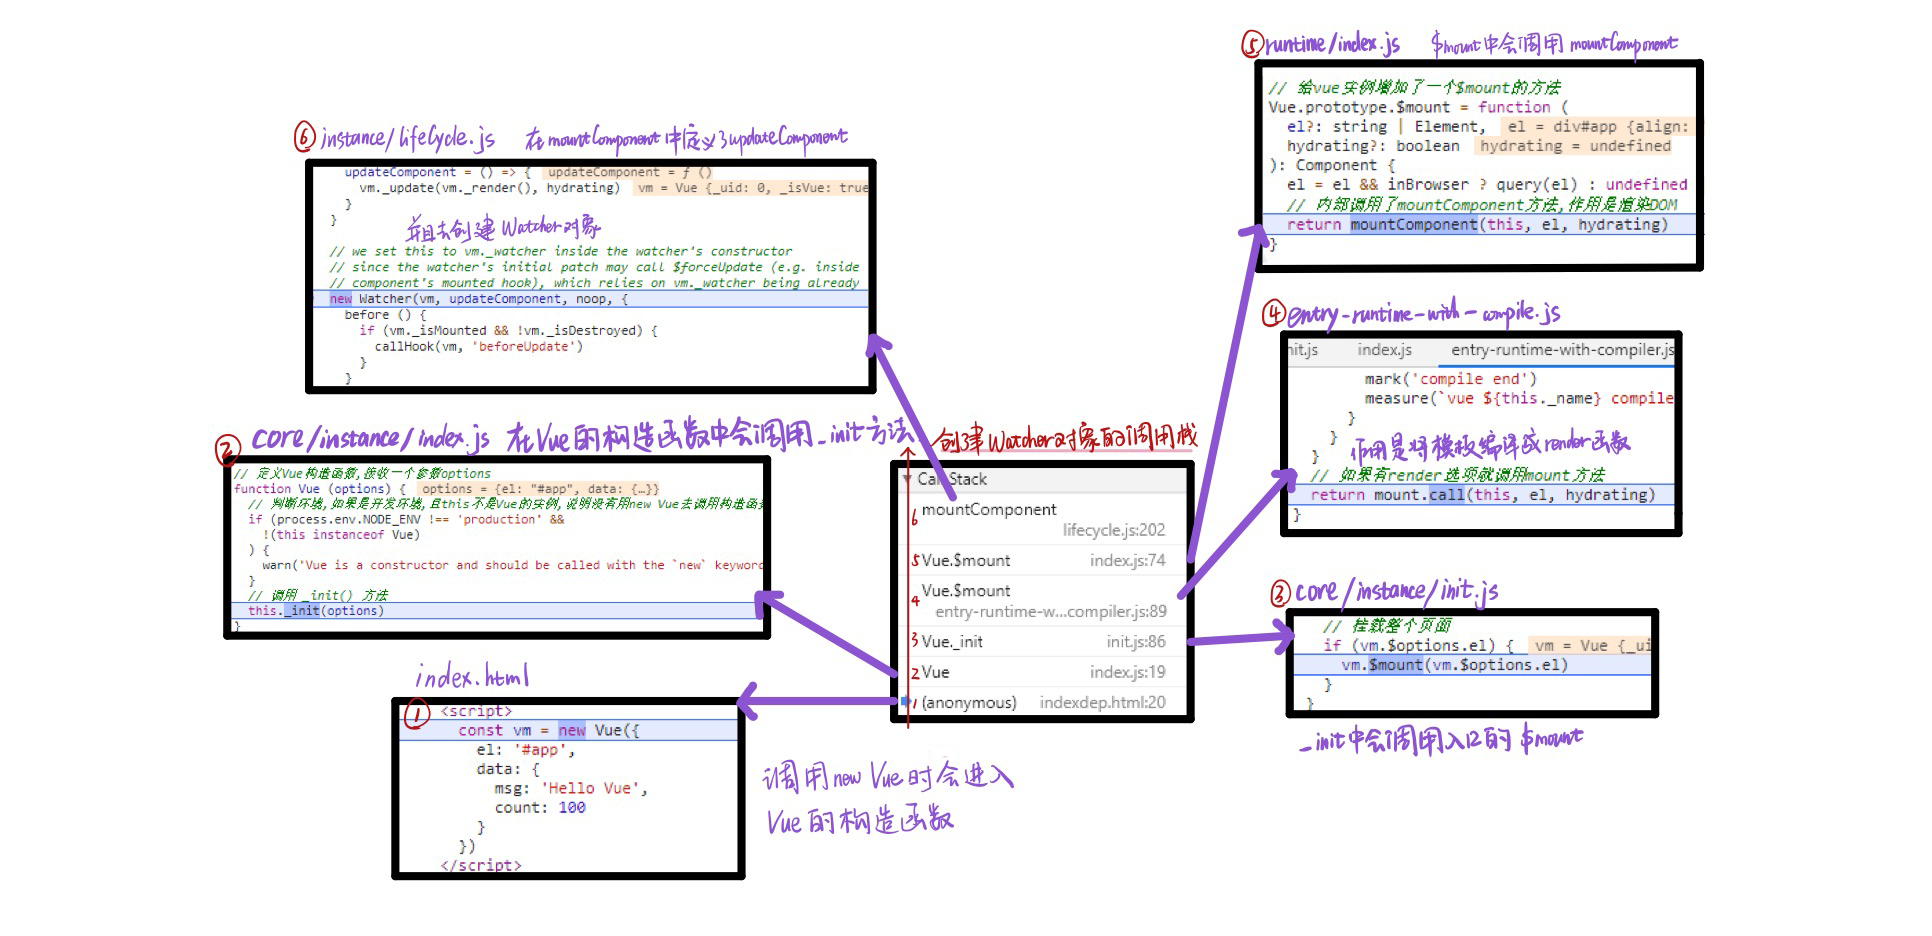
调试收集依赖过程
准备html代码
html
<!DOCTYPE html>
<html lang="en">
  <head>
    <meta charset="utf-8">
    <title>Vue.js 01 component example</title>
  </head>
  <body>
    <div id="app">
      <h1>{{ msg }}</h1>

      {{ msg }}

      <hr>

      {{ count }}
    </div>

    <script src="../../dist/vue.js"></script>
    <script>
      const vm = new Vue({
        el: '#app',
        data: {
          msg: 'Hello Vue',
          count: 100
        }
      })
    </script>
  </body>
</html>模板是app,里面使用了msg和count,msg在两个位置中使用,收集依赖的过程就是通过msg属性对应的dep对象,收集组件vm对应的watcher,把watcher添加到dep的subs数组中,模板中使用了两次msg,添加依赖的时候只需要添加一次,只要msg发生变化,就通知对应的watcher对象,让watcher去更新视图.
开始调试
打开开发者工具,我们要把断点设置到哪里?
我们要调试的是收集依赖的过程,我们是从Watcher的get方法中开始收集依赖的,所以我们的断点设置到创建Watcher对象的位置.
什么时候创建Watcher对象呢? 是在mountComponent中,在instance/lifecycle.js中
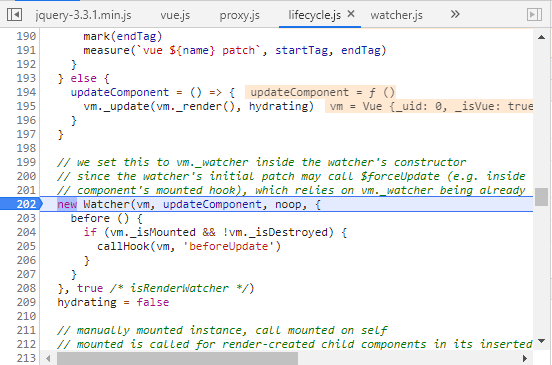
这个时候我们分析一下调用栈
Watcher
接下来我们分析一下watcher,按F11进入构造函数,
在watcher的最后调用了get方法,设置断点,按F8
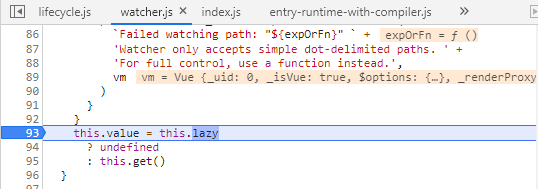
Watcher的get方法
按F11进入get方法,get方法中首先调用了pushTarget方法,F11进入pushTarget 了
pushTarget方法
在中传入了Watcher对象,并且将其存储到Dep.target中
getter方法
这个getter方法其实就是updateComponent
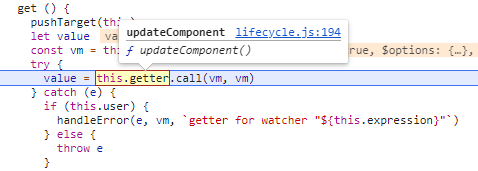
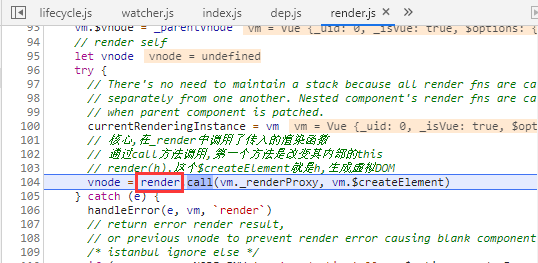
按F11进入updateComponent

updateComponent
调用__render方法创建虚拟DOM,将生成的虚拟DOM传给_update,把虚拟DOM转换成真实DOM,渲染到页面中
按F11进入_render方法
_render方法
会调用用户传入的render或者编译生成的render,按F11进入
用户或编译模板生成的render函数
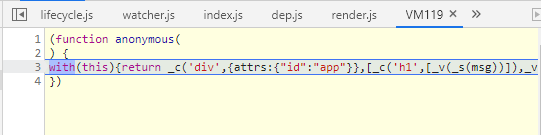
在这个函数中,调用了_c和_v,这些都是渲染相关的方法
_c:createElement,即h函数,h函数就是为了生成虚拟DOM_s:toString,会把用户传入的转化成字符串_v:创建文本的虚拟节点,textVNode_v(_s(msg))这个应该是this.msg,这里没有用this是因为前面用了with(this),所以可以省略this- 访问上面的属性时,就使用了get方法,就要收集依赖
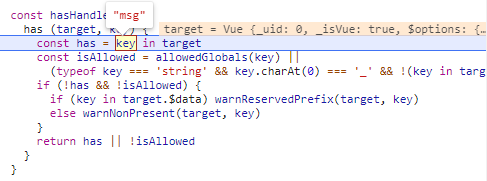
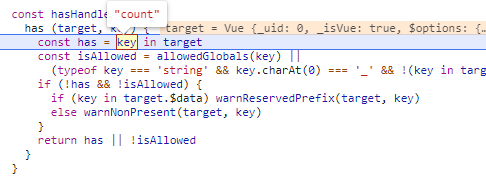
按F11进入可以看到跳转到了hasHandler
hasHandler
这个方法是用来判断_c、_v、_s和msg这些对象是否存在的

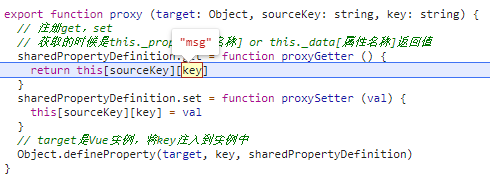
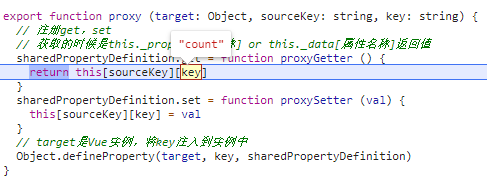
当访问msg的时候会进入其get方法,这个msg访问的就是this._data.msg
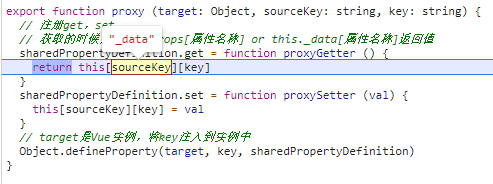
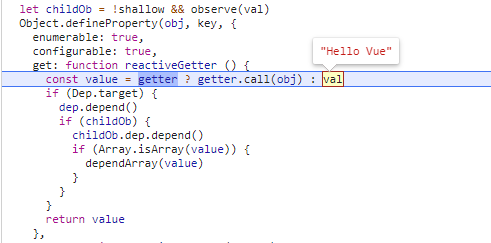
this._data.msg的get方法
按F11,会进入this._data.msg的get方法
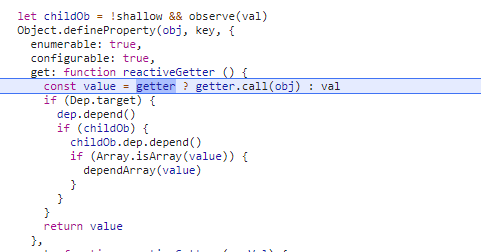
要在这个方法中去获取依赖,首先要获取属性的值
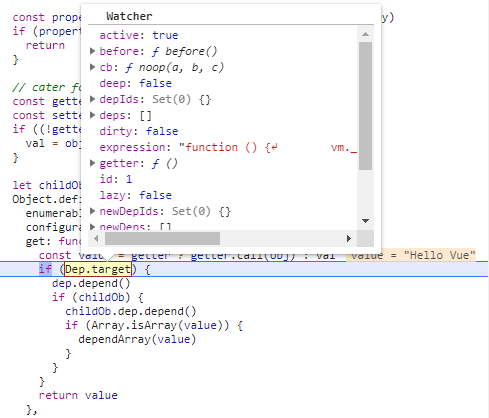
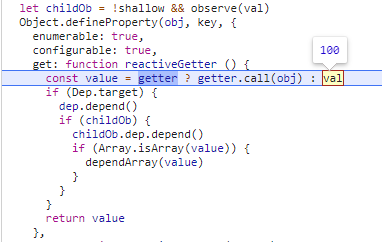
接下来要判断Dep.target,首先回顾一下,我们在哪里定义的Dep.target?
我们在watcher对象的get方法中调用了pushTarget,在里面定义了Dep.target,放的是Watcher对象
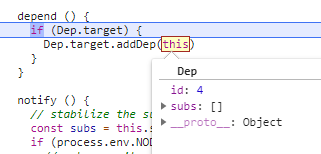
接下来要收集依赖 dep.depend() ,现在收集的是第一次调用msg时候的依赖
depend
按F11进入depend(),再次判断dep.target
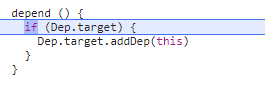
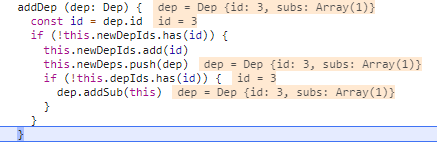
然后要调用 Dep.target.addDep,也就是Watcher对象的addDep方法,里面的this就是Dep对象,也是msg对应的Dep,它的id是3
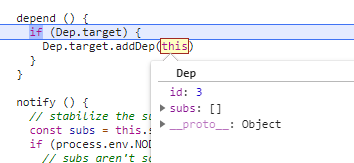
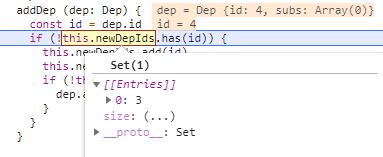
按F11进入addDep方法
addDep
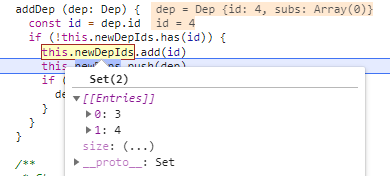
先把dep的id赋值,然后判断newDepIds这个集合中是否有了该对象,如果没有就会添加依赖,并且把dep对象添加到newDeps集合中
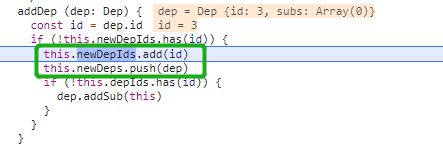
然后判断depIds集合中有没有这个依赖,没有的话,就会执行dep的addSub函数
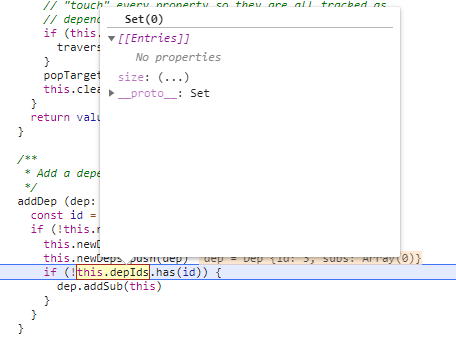
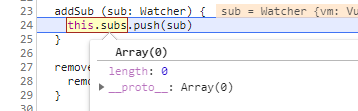
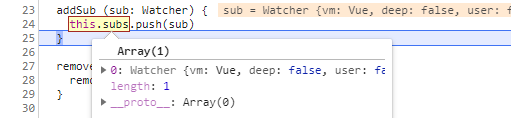
按F11进入addSub方法
addSub
可以看到传入的sub就是Watcher对象
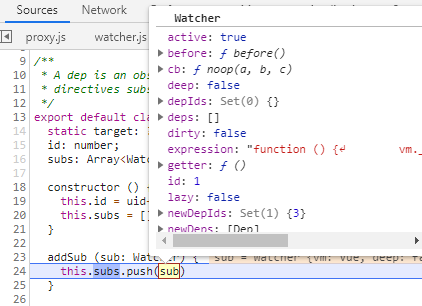
会添加到dep的subs数组中,一开始其长度是0
执行之后可以看到长度为1,Watcher对象被编译了进来
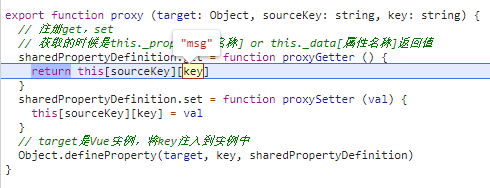
到这里依赖添加完成,我们回到proxy的地方,此时第二个访问msg
按F11进入h函数,里面有很多,直接快进到第二个msg
下面看第二个访问msg依赖的收集情况,F11进入get方法,还是要判断Dep.target.第二次调用depend,F11进入depend方法之后执行addDep方法,按F11进入
addDep中先获取dep的id,因为这个dep在之前已经收集过依赖了,

在newDepIds的集合中已经有id为3的元素了,所以会跳过不会再收集依赖了.
那之后count的属性的依赖和msg是一样的
运行到count属性时,F11进入
这里调用this._data.count的get方法,F11进入
进入depend函数中有进入addDep函数,并将其Dep对象传入
此时id是4,与之前的3不同,所以判断它不在newDepIds集合中
按F10 将其添加到在newDepIds集合中
然后判断其单不单depIds的集合中,不在的话要添加到Dep对象的subs数组中

这样count的依赖也收集完毕了